 Skip to content
Keeping your enamel pins from falling off can be a real struggle — one moment they’re showing off your style, the next they’re gone forever. Most people assume the problem is the pin back. In reality, pin loss is usually caused by a combination of pin design, placement, and backing choice. If you understand how these factors work together, you can dramatically reduce the chances of losing your pins.
Let’s start with the part that matters most — before any backing comes into play.
Posts and Placement Matter More Than You Think
Before switching pin backs, using glue, or buying display bags, it’s important to look at the pin’s structure. Many pin losses happen simply because the pin was never stable to begin with.
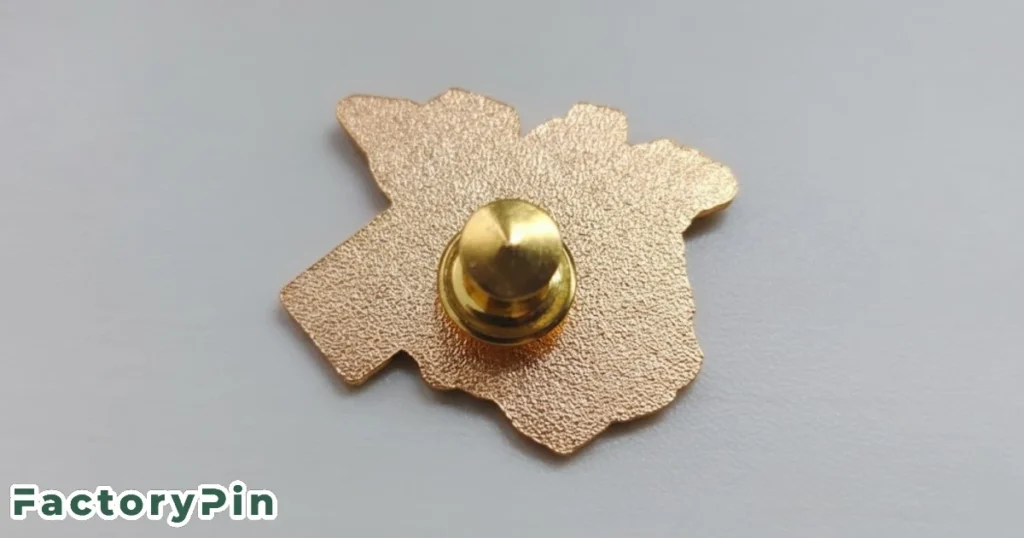
Why single-post pins fail so often
Pins with only one post rotate easily. As you move, the pin twists, pulls at the fabric, and slowly works itself loose. Over time, even a decent pin back can’t compensate for that constant movement.
That’s why pins with two or more posts are always more reliable. Multiple posts distribute tension, keep the pin aligned, and prevent spinning.
Post placement rules that actually matter
The direction of the posts is just as important as the number:
- If a pin is wider than it is tall, the posts should be placed horizontally
- If a pin is taller than it is wide, the posts should be placed vertically
Ignoring this creates leverage, which increases the risk of loosening or fabric damage.
If you’re a pin designer, this should be planned during production. If you’re not, it’s still worth checking whether a pin feels balanced and stable before wearing it.
Fabric and location make a difference
Even a well-made pin can fail if it’s placed poorly.
- Denim and thicker fabrics tend to hold pins more securely and stretch less
- Avoid high-friction areas like backpack straps, sleeves, waistbands, or bag edges that rub constantly
Once the pin itself is stable and well placed, backing solutions actually start to work as intended.
Using Locking Pin Backs
Locking pin backs are one of the most effective ways to prevent enamel pins from falling off. They use an internal locking mechanism that grips the post firmly and only releases when unlocked manually.
They’re especially useful on backpacks and bags.
Because they’re metal and lock tightly, they stay in place even when the pin gets bumped or pulled. They’re also easy to find online and usually inexpensive when purchased in bulk.
That same strength is also their limitation. Since locking backs are rigid metal, they can feel uncomfortable on soft clothing or anywhere the pin presses directly against your skin. For that reason, they’re best not to use on hat and clothing.
If you want a detailed walkthrough on how to use different locking styles correctly, we’ve covered that in a separate guide on locking pin backs.
Using Super Glue
Rubber backs come with most enamel pins, and for soft clothing or wear close to the body, they’re the most comfortable option. However, they do tend to loosen over time, especially with repeated use or if used on thick fabrics.
How to make them more secure:
Some collectors add a tiny bit of super glue inside the rubber clutch or on the pin post when they’re sure about the pin’s placement. This gives the rubber clutch a semi-permanent grip.
What users say:
“Those backs never seem to stay, ever… so I use a little superglue once I’m sure I like where the pin is.”
“If I want to remove it later, I just twist it off with pliers. It takes effort, but totally worth it.”
Things to consider:
Once glued, it’s harder (but not impossible) to reposition the pin. So only use this method when you’re sure about the placement.
Best for:
T-shirts, light jackets, anywhere comfort matters — and especially when you want to keep the pin close to your body without discomfort.
Try an Ita Bag or Clear-Window Bag
If you love showing off your pins on the go but hate the risk of losing them, an ita bag or any bag with a clear display window is a smart choice.
These bags come with a canvas insert you pin into, then tuck safely inside a zippered window compartment. The result? Your pins are protected from getting snagged, scratched, or yanked off — but still visible to admire.
While ita bags are often associated with anime or cosplay, any bag with a transparent window and an insert will do the job.
This setup works particularly well for daily carry when you don’t want pins on clothing, travel and conventions.

Final Thoughts
Enamel pins are meant to be enjoyed, not worried about. With a stable design, smart placement, and the right level of security, there’s no reason to keep checking whether your pin is still there.
A quick wipe with a soft cloth now and then also helps remove oils and dirt that can weaken the backing over time. We’ve covered pin care and cleaning in more detail in a separate guide if you’d like to go deeper.
If you’re creating your own enamel pins, thinking about post placement and overall stability early on makes a noticeable difference in how well they hold up in everyday use.
FAQs
What is the best type of back for enamel pins?
For security and longevity, deluxe locking pin backs, flathead locks, and screw backs are among the best options. Each offers different levels of hold, from daily wear to permanent display setups.
How do you keep enamel pins from spinning?
Pins with a single post tend to spin around. Opting for double-post pins or using a small dab of adhesive on the back can prevent annoying rotations.
Is it safe to glue enamel pins?
Yes — but only for permanent setups. Super glue or strong adhesive works well for display boards, but avoid using it on wearable pins unless you’re sure you never want to move them again.

