
Have you ever had an amazing design idea but didn’t know how to turn it into a custom enamel pin? If you’ve searched for “how to make an enamel pin,” you’re likely looking for a simple, step-by-step guide that shows you how to bring that awesome idea to life. The good news is—you’re in the right place!
We can break down the process of making your personalized enamel pin into 6 easy steps. Whether you’re creating pins for your business, a special event, or your own collection, by following these steps, we can help you get your custom pins in hand in just 2-4 weeks. Let’s jump right in and get started on bringing your design to life!

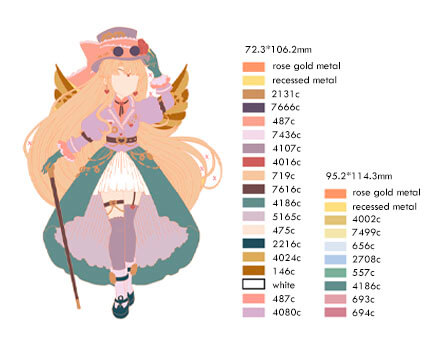
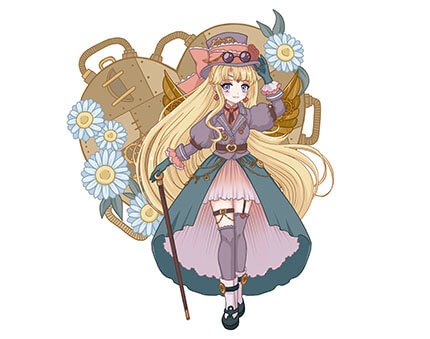
Step 1: Prepare Your Design Files (Keep It Simple!)
Design is the foundation of every great enamel pin. If you already have an idea, you can either commission an artist—many of whom specialize in enamel pin artwork and sell ready-made designs online—or create one yourself. If you’re interested in designing your own, check out our blog post: How to Design Enamel Pins Even If You Can’t Draw. It’s packed with tips even for beginners.
Of course, if your design is more complex, you might want to add special effects like gradients, screen printing, or UV printing to achieve the result you’re imagining. Not sure which technique fits your vision? Feel free to ask our team—we’re happy to help you choose the right process.
Once your artwork is ready, don’t forget to save it in a vector format like .AI, .EPS, or .PDF. This ensures the best quality and makes production much smoother.
Step 2: Don’t Forget About the Back of the Pin
The front of your enamel pin is where the magic happens, but don’t ignore the back—it’s just as important! The back helps keep your pin secure and even gives you extra space for customization.
Pin Backstamp: Add a Personal Touch
The back of your pin isn’t just for function—it’s a great place to add a small design. You can include your company logo, brand name, or even a slogan. It’s an easy way to promote your brand and mark your work with a unique signature. Some brands also use this space for copyright information.
Pin-Back: How Many Do You Need?
A pin-back is the needle-like mechanism that attaches your pin to a surface. The number of pin-backs you need depends on the size and weight of your pin:
- Small pins (under 1 inch): One pin-back is usually enough.
- Medium pins (1-1.5 inches): One pin-back works, but adding a second one provides extra stability.
- Large pins (over 1.5 inches): Two or even three pin-backs are recommended to keep the pin from rotating or falling off.
For oversized or heavy pins, using additional pin-backs ensures they stay securely attached without tilting or shifting.
Pin Backing Card: Packaging That Stands Out
A pin backing card isn’t just for holding the pin—it’s part of the presentation. A well-designed card can:
✔️ Make your brand more recognizable
✔️ Highlight the pin’s design
✔️ Give extra space for branding, a slogan, or contact info
If you’re selling or gifting your pins, a custom backing card adds a professional touch and makes your pins look even more appealing.
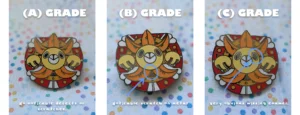
Step 3: Hard Enamel vs. Soft Enamel – Which One to Choose?
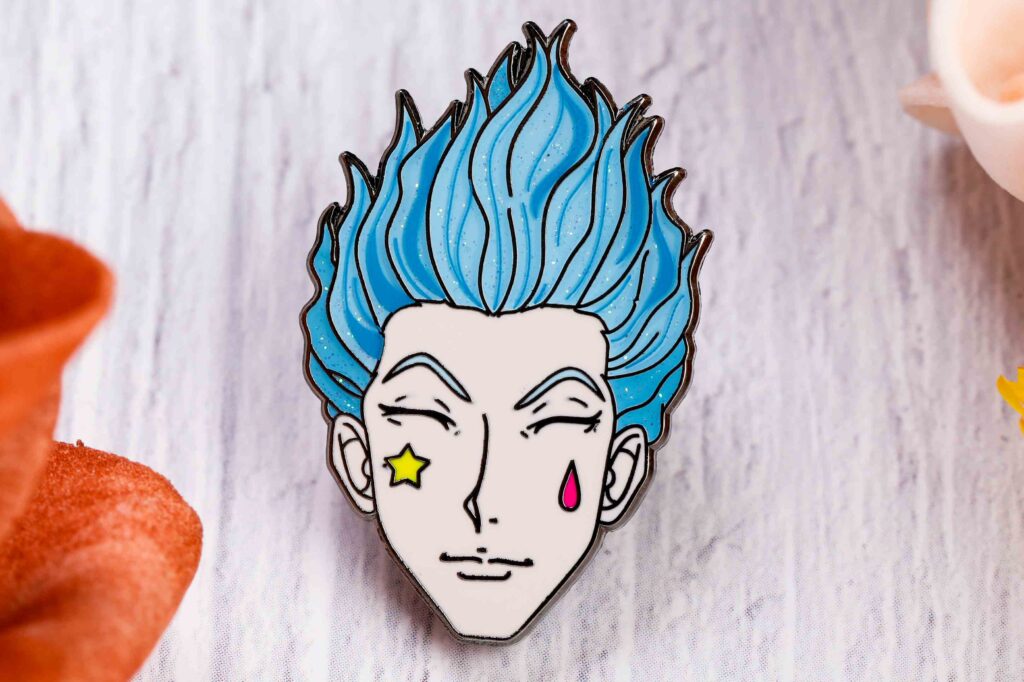
Now that you’ve finalized your front and back design, it’s time to decide between hard enamel and soft enamel. The biggest difference? Hard enamel has a smooth, polished surface, while soft enamel has a textured, raised-metal look. Both are great options—it really comes down to your design style.
Soft enamel is often used for smaller, simpler designs, while hard enamel is ideal for larger or more detailed artwork. But there’s no strict rule here—you can even combine both in one design if it suits your vision. Either way, you’ll end up with a high-quality pin.

Step 4: Choosing the Right Factory & Communicating Like a Pro
Picking the right factory is just as important as designing your pin. A good factory ensures quality, fair pricing, and smooth production. But how do you know which one to choose?
How to Evaluate a Factory
Before placing an order, take some time to research. Here are a few ways to assess a factory’s reliability:
✅ Check Their Work – Look at their social media posts or online galleries. This gives you a sense of their craftsmanship.
✅ Ask for Samples – If possible, request a sample pin or at least a photo of a past project similar to yours.
✅ Get Recommendations – If you know other designers who have ordered pins, ask them about their experiences.
✅ Talk to the Sales Team – No matter what others say, your own experience matters most. Reach out and ask questions!
Finding the right factory isn’t just about price—it’s about quality, trust, and communication. Do your research, ask the right questions, and don’t be afraid to negotiate. The more informed you are, the smoother your pin-making journey will be!
Common Industry Practices You Should Know
Most direct manufacturers have a minimum order quantity (MOQ), usually 30–50 pieces. Intermediaries might offer no MOQ but often charge more per pin.
You’ll usually pay in two parts:
- Design/proofing fee to get your artwork processed and approved.
- Final balance before full production and shipping.
In many cases, if you go ahead with full production at the same factory, the design fee will be deducted from your final invoice.
If needed, you can also pay just for the artwork and switch to another factory using the mold files. That’s totally okay.
Once you’ve paid for the design, the factory will usually provide proof photos or sample videos before moving forward. If you want a physical sample, just ask—it’s possible, though it might take extra time. Also, molds are typically kept for 2–3 years, so you can reorder without paying the mold fee again. If you’re concerned about copyright, you can even request to have the mold and any leftover products shipped to you after production.
To avoid misunderstandings and speed things up, be as clear as possible when communicating with the factory. Here’s what to include:
- Your vector design file (.AI, .PDF, or .EPS), including Pantone colors and any special effects (e.g., glitter, glow-in-the-dark)
- Pin size and quantity
- Plating and backing choices (gold, black nickel, rubber clutch, locking back, etc.)
- Your deadline, especially if the pins are for an event
- Your budget, and whether you’re looking for bulk discounts or first-time deals
The more details you provide upfront, the smoother your custom pin experience will be. And don’t forget—production takes time, so if you’re working with a deadline, be sure to plan ahead!

Step 5: Budgeting, Quantity & Timeline—Keeping It Smooth
Planning ahead will save you money, time, and stress when making your enamel pins. Here’s how to budget wisely, choose the right quantity, and stay on schedule.
💰 Budgeting: What Affects the Cost?
The price of your pins depends on several factors:
🔹 Soft vs. Hard Enamel – Soft enamel is more budget-friendly, starting at $1.50 per pin (100+ units). Hard enamel, with its polished finish, costs more—usually $2.00-$2.50 per pin.
🔹 Size & Complexity – A larger or highly detailed pin means a higher price. A 2-inch pin can cost 50% more than a 1-inch pin.
🔹 Cost-Saving Tips:
✅ Use UV printing instead of complex enamel fills to save money.
✅ Limit colors—fewer Pantone colors mean lower costs.
✅ Order in bulk—pricing drops significantly at 100+ units.
📦 Quantity: How Many Should You Order?
Your order size impacts pricing and flexibility:
✔ 30 Pins – Ideal for limited editions or personal projects. (MOQ at most factories, including Factorypin.)
✔ 100-500 Pins – Best for brands, artists, or businesses—big savings per unit!
✔ 1,000+ Pins – If you’re selling at scale, this gives you the lowest per-unit cost.
⏳ Timeline: When Will Your Pins Arrive?
🏭 Standard Production: 2-4 weeks from order confirmation.
⚡ Rush Orders: Need pins fast? Pay extra for 1-2 week turnaround.
🚚 Shipping Time: 1-2 weeks depending on location & shipping method.
✅ Pro Tip: To avoid delays, confirm your design details and payment early. Last-minute changes can push back production!
By setting a realistic budget, choosing the right quantity, and planning ahead, your enamel pin project will go smoothly—without unnecessary stress or extra costs.
Got a deadline? Order early and communicate clearly with your factory! 🚀
Step 6: Recommended Enamel Pin Manufacturers
Choosing a reliable manufacturer is one of the final steps in your custom enamel pin journey. Here are a few top recommendations:
- Factorypin – With a strong reputation for quality and customer service, Factorypin offers:
- Customizable options for both hard and soft enamel pins.
- Free design consultations and first-time customer discounts.
- Competitive pricing with MOQs starting at just 30 pins.
- Pin Pros – Known for their fast turnaround times, they specialize in producing high-quality soft enamel pins.
- Lapel Pins Plus – Offers eco-friendly manufacturing options and a wide variety of finishes.
- The Pin People – Ideal for larger orders and offers personalized customer support throughout the process.
By working with trusted manufacturers, you can rest assured that your enamel pins will meet your expectations.
Conclusion
And that’s a wrap! 🎉 Now you’ve got everything you need to design, produce, and order your custom enamel pins like a pro.
Got questions or need a little extra guidance? Shoot us a message—we’re always happy to help.
Happy pin-making! 😊